Players Guide
Introduction
In PlaneShift, we aim to create a persistent world in a fantasy setting, in which every player may create characters that live, explore, and interact with maximum realism.
You will start your journey as a citizen of the realm of Yliakum, an enormous underground world filled with a myriad of races, guilds, creatures and other foes to battle, and many places to explore and find or create your own adventures. For those who enjoy playing a more quiet life, there will be many jobs and careers to choose from, and always a tavern nearby to rest your feet, enjoy refreshments and make new friends. The path you choose will be your own.
The realm of Yliakum exists under the guidance of several gods and a firm-handed government [ <- Old Players guide link!]. Here magic is an important part of the lives of the people; this is considered a gift of the gods. Beyond Yliakum, concealed by the Bronze Doors, the deadly Stone Labyrinths await eager explorers. What mysteries will be discovered? Perhaps you will be the first to rediscover ruins lost in the dark depths, or to navigate mysterious dungeons, or to uncover the fate of the great Lemur cities of Kadaikos. The adventure continues even in death. Will you become a tool of the dark?
Enter the world of PlaneShift and discover the truth for yourself.
Development Notes
PlaneShift is fully and permanently open source and free. Currently under heavy development in the early alpha stage, it is run by a very small team of volunteers working with no funding. Every player should know this: you are becoming a tester, not a player of a fully developed commercial game produced by a million-dollar company. As such you are welcome to try out as many of the things currently implemented as you can, and give the development team feedback.
Report bugs at http://www.hydlaaplaza.com/flyspray/ , follow the Development section of the game forum and consider giving your time to contribute to the PlaneShift project.
Useful links:
System Requirements
PlaneShift will run on most personal computers with Windows, Mac OS X or Linux/Unix operating systems and an adequate 3D-accelerated graphics card.
Minimum Requirements:
- Operating system: Windows (2000, XP or Vista), Mac OS X 10.4.11, Linux (2.6 kernel, glibc 2.7), FreeBSD or Solaris
- Graphic chipset: Radeon R200 (8500-9250), GeForce 4 Ti/4200Go series, or Intel GMA X3100* * Note that Intel chipsets are not optimum for PlaneShift.
- CPU: 2.4 Ghz Pentium 4 or Athlon XP 2600+
- Others: 2 GB RAM , 1 GB free disk space, low noise GPRS internet connection
Recommended Requirements:
- Operating system: Windows (XP, Vista, 7), Mac OS X 10.5.8, Linux (2.6.27+ kernel, glibc 2.9)
- Graphic chipset: Radeon R420 (X700-X850) or GeForce FX series**
- CPU: Intel Pentium D 3.0Ghz or AMD Athlon 64 3200+
- Others: 4 GB RAM for Windows, 4 GB RAM for Mac OS X, [need Linux], 2 GB free disk space, Broadband Internet connection
Other cards may work but are not supported by the staff.
Downloading and Installing PlaneShift
The PlaneShift download size is about 1.1 GB. The download time will vary from under one to several hours according to the server’s upload bandwidth and the type of Internet connection you have. Win7 and recent Linux version installers require higher access rights. If you face technical difficulties, you can find help either by contacting us on IRC or by posting on our game forum.
To advanced users: The download package is pre-compiled. If you prefer to install PlaneShift from source code, please refer to the PlaneShift Compiling Guide.
Windows Users
- Download for Windows
- Once downloaded, double click the downloaded icon and step through the installer.
- Once the installation is complete, a new folder will appear in your Start Menu titled PlaneShift.
Mac OS X Users
- Download for Mac OS X
- Double click the downloaded PlaneShift icon and copy the PlaneShift folder to your Applications folder or other selected location.
Linux/Unix Users
- Download for Linux
- Once the download is complete, install the package as per your platform's requirements.
Updating PlaneShift
Before playing PlaneShift for the first time, it is essential to run an update within the pslaunch application. After this initial update, it is advisable to check for available updates from time to time, as the PlaneShift development team will continue to fix bugs, add features and expand new areas after release. Some of these changes may result in users not being able to log onto the PlaneShift server without updating.
Windows Users
- Locate the PlaneShift folder in the Start Menu and click on the pslaunch application (PlaneShift icon) or locate pslaunch.exe inside the installation directory (def: %ProgramFiles(x86)%\PlaneShift\pslaunch.exe)
- A window displays the following message: “An update to PlaneShift is available. Do you wish to update now?” Click “Yes”.
- You will see the progress of the update as recent changes are downloaded.
- Run pslaunch from time to time to get the latest updates. Sometimes you will be required to update in order to connect to the server. Clicking on “Repair” also compares and corrects all non-matching program files against the currently released game version.
IF the launcher itself crashes or you would like to schedule updates, run the following command: “pslaunch.exe /repair”
Mac OS X Users
- Open the PlaneShift folder. To run the initial update and check for available updates in the future, double-click on the pslaunch application, or Ctrl-click and select “Open” to override security preferences.
- A window displays the following message: “An update to PlaneShift is available. Do you wish to update now?” Click “Yes”.
- You will see the progress of the update as recent changes are downloaded.
- Run pslaunch from time to time to get the latest updates. Sometimes you will be required to update in order to connect to the server. Clicking on “Repair” also compares and corrects all non-matching program files against the currently released game version.
IF the launcher crashes during the update, unpack the zip file manually:
- Open the PlaneShift folder and find the new pslaunch.zip file.
- Unzip the file. It should expand into a folder.
- Open the folder and replace the older existing items in your PlaneShift folder with these new files. Be careful to move the new items to the exact same location of the older items that need replacing.
This is a work-around to manually aid the update. Once this is done, the rest of the update should run fine if you open the pslaunch application again and click “Yes” to the update prompt or click “Repair”.
Linux/Unix Users
- Find and click the pslaunch application (PlaneShift icon) under the Applications/Games menu of your desktop environment or run pslaunch inside the installation directory (def: /opt/PlaneShift/pslaunch).
- A window displays the following message: “An update to PlaneShift is available. Do you wish to update now?” Click “Yes”.
- You will see the progress of the update as recent changes are downloaded.
- Run pslaunch from time to time to get the latest updates. Sometimes you will be required to update in order to connect to the server. Clicking on “Repair” also compares and corrects all non-matching program files against the currently released game version.
IF the launcher itself crashes or you would like to schedule updates, apply the following command: “./pslaunch --repair”
Configuring PlaneShift
After installing and updating, click on “Settings” from within the pslaunch application. You will see the General preferences page. This allows you to configure PlaneShift for video preferences and hardware compatibility. The default PlaneShift skin is “Elves”. In order to switch to another skin, first download it from links provided in the PlaneShift mods section of the game forum. Then return and click “Skins” to make your choice.
For sound preferences, click “Audio”.
For graphics preferences, click “Graphics”. To avoid issues with lighting, it is recommended that the “Low” and “Lowest” shader settings be avoided.
Mac OS X Users
For best performance, Mac OS X Users should choose “software” as the sound render option:
enter settings, change “OpenAL” to “Software” on the Audio page and click “OK”.
The default configuration settings should be adequate for most systems, but if you have trouble running and/or playing the game, please consult the Technical Help section of the game forum for tips and troubleshooting or contact us on IRC.
Creating an Account
Accounts in PlaneShift are free of charge. You will need one in order to play the game. To create a PlaneShift account, visit the PlaneShift website player registration page and follow the instructions:
- Click on “Create New Account”.
- Enter your real or chosen name and a valid e-mail address. Enter the e-mail address again (to make sure you entered it correctly).
- Optional: Specify your country, gender and age for statistical purposes.
- Click on “Create Account”. Login to the e-mail account that you specified above. If your PlaneShift account was successfully created, you will be sent an e-mail containing an account activation link.
- When you receive your activation email, with the subject "PlaneShift Account Verification", read it and then click the verification link in the e-mail.
- On the verification page, enter a password for your new account and then click “Set Password”.
At this point, you are ready to run PlaneShift. See “Running PlaneShift”.
Running PlaneShift
All options for running PlaneShift can be specified using the configuration program, which is run by opening pslaunch and clicking “Settings”. You can run PlaneShift either in full screen or windowed mode, but it is recommended that Mac OS X users opt for windowed mode while others stick with full screen setting.
Windows Users
From your Start menu click PlaneShift. In the newly opened “PlaneShift Launcher”, click “Play”. When the server connection screen appears, enter your account username and password. If the server status is “Failed”, check that you have completed initial and further updates (see "Updating PlaneShift"). Then click “Login”.
Mac OS X Users
Open the PlaneShift folder in your Applications folder or other selected location. Double-click on the psclient application, or Ctrl-click and select “Open” to override security preferences.
When the server connection screen appears, enter your account username and password. If the server status is “Failed”, check that you have completed initial and further updates (see "Updating PlaneShift"). Then click “Login”.
Linux/Unix Users
From your desktop environment's Application menu click PlaneShift. In the newly opened “PlaneShift Launcher”, click “Play”. When the server connection screen appears, enter your account username and password. If the server status is “Failed”, check that you have completed initial and further updates (see "Updating PlaneShift"). Then click “Login”.
Character Creation
Before joining the game, give some thought to the kind of character you would like to play. You can find information about the world of PlaneShift at Setting Overview and Races pages or in the following sections of this Player Guide.
The first screen you will see when you connect to the server is the character selection and creation screen, “Choose Your Character”. When you are ready to create your character, click “New Character”. An account can host up to 4 characters. Subsequent to character creation, to join the game as an existing character simply select the character and click “Join”.
- “Create a New Character”: Name, Race and Appearance
- “Create a New Character”: Name, Race and Appearance


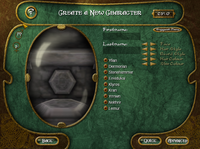
You arrive at this screen after clicking “New Character” on the “Choose Your Character” screen. Enter a first and last name for your character, bearing in mind that it should be a fantasy or medieval-style name. You will be prompted later to change the name if it is already in use. Alternatively, click on “Suggest Name” for a randomly generated name.
Next, choose from the 9 playable races in the menu. Read more about the races at http://www.planeshift.it/races.html . Each race has particular Character Statistics (<- old link - probably!), reflecting particular racial traits. Please note that not all race and gender models are available in this version, so you will see the message "Not Available" on the races and genders that don't already have a 3D model in the game. Existing models are used to represent these races and genders.
Choose the gender of your character from the Male (M) and Female (F) icons at the top left of the screen. Male and female of any race differ from each other only in appearance and are identical in game terms, having exactly the same stats, skills, level increases, etc. Kran are the only genderless race.
Use the arrow controls to customise your character’s face, hairstyle, beard style, hair colour and skin colour. Note that not all choices are available to all races.
At the top right of the screen, CP denotes Character Points (150), which are used for “Advanced” character creation.
You now have two options: Click on “Quick” to choose from 6 pre-defined life paths that do not require the use of CP for customisation, or “Advanced” for a longer, more in-depth creation process.
- “Paths”: Quick Creation
- “Paths”: Quick Creation
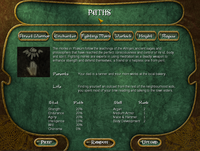
You arrive at the “Paths” screen if you clicked “Quick” on the “Create a New Character” screen.


Instead of using Character Points to customise your character, simply choose from the 6 pre-defined life paths: Street Warrior, Enchanter, Fighting Monk, Warlock, Knight or Rogue. Clicking on each will reveal the stat increments (by percentage) awarded to that path, as well as a pre-determined family background and ranks in certain skills.
Please note that PlaneShift does not have classes and your character is not bound to any of the 6 paths as professions when increasing in experience. After some adventuring, you may allot your received Progression Points to the skills you prefer, regardless of the choice you make now. In other words, choosing a life path does not restrict you to learning only certain skills. You may choose to combine magic and swordskill, fishing and smithing, all in one character.
When you have made your choice, click “Upload”. Once successfully uploaded, your new character will appear as an option on your character selection screen when next you play PlaneShift.
Now that you are finished creating your character, proceed to Welcome Area for a helpful tutorial covering your first experiences in the game.
- Advanced Creation
- Advanced Creation
Here, you may decide your character’s background in greater detail. Your choice of events will influence your character’s starting stats and skills (<- old link - probably!) to a small degree, but will not stop your character learning or even mastering any skills as he or she gains experience in game. After some adventuring, you may allot your received Progression Points to the stats or skills you prefer, regardless of the choices you make now. You may choose to combine magic and swordskill, fishing and smithing, all in one character.
From a role-playing perspective, advanced-creation choices might explain how your character developed, or what motivates him or her. Be assured, however, that these choices do not limit your backstory once your character is in-game. You will be free to think of details not included in this list or come up with your own character backstory. The number of Character Points remaining (from 150 at the start) is displayed at the top right of the screen.
- Birth
- Birth

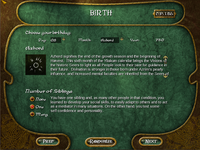
The Yliakum year is divided into 10 months, each having 32 days. Click on the months to read the characteristics associated with each, then select a birth date for your character, and any number of siblings, or click “Randomize”. The number of Character Points remaining (from 150 at the start) is displayed at the top right of the screen.
Click “Next” to proceed to the next screen, “Parents”.
- Parents

Choose your character’s father’s and mother’s professions, their respective levels of fame and their religion, or click “Randomize”. (The interface does not currently support options for fewer than two parents.) The number of Character Points remaining is displayed at the top right of the screen.
Click “Next” to proceed to the next screen, “Childhood”.
- Childhood

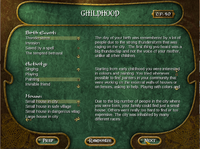
Choose a birth event, an early childhood activity and your character’s childhood home, or click “Randomize”. The number of Character Points remaining is displayed at the top right of the screen.
Click “Next” to proceed to the next screen, “Life Events”.
- Life Events

Select the life events that might have moulded your character in his, her or kra’s past. The number of Character Points remaining is displayed at the top right of the screen. Note that you will not be able to upload a character with negative CP. To return to previous screens to change your choices, click “Prev”.
Click “Next” to proceed to the next screen for final customisation and upload.
- Final Customisation and Upload

You should receive a prompt to upload your character. To review your choices or adjust any aspects of your character’s life, click “No” and “Prev”.
When you are happy with your choices, upload your new character to the server by clicking “Upload”. Once successfully uploaded, your new character will appear as an option on your character selection screen when next you play PlaneShift.
Now that you have finished creating your character, proceed to the Welcome Area for a helpful tutorial covering your first experiences in the game.